Grilling
How to Set Up a Two-Zone Charcoal Grill for Indirect Cooking
Two-zone cooking is the most useful habit you can build on a charcoal grill. Put your coals on one side, leave the other side empty, and you get two working areas: a fierce one for colour and crackle, and a gentle one for cooking through without turning dinner into a cinder. Do it a few times and you'll set it up by instinct, even for a quick round of sausages.
It works on any kettle, barrel or hinged-lid barbecue and costs nothing beyond a chimney starter. Here's how to lay the coals out, how much to use on a British-size grill, and where to set the vents so the heat behaves.
What the two zones actually do
The direct zone sits over the coals. Heat hits the food from below, fast and fierce — that's where you sear steaks, blister peppers and get sausage skins to snap.
The indirect zone has no coals beneath it. Heat arrives from the side, rolls around under the closed lid and travels across the food towards the vent. It behaves more like a fan oven than a grill. Chicken joints cook through without the outside burning, a whole bird browns evenly, ribs and shoulder sit happily for hours, and finished meat can rest in warmth instead of going cold on the kitchen worktop.
What you need
- Charcoal. Briquettes for steady, long indirect cooks; lumpwood for quicker, hotter sessions. Skip instant-light bags — the accelerant leaves a taste.
- A chimney starter, ideally two. You want grey coals, not flames.
- Long-handled tongs for banking coals and moving food.
- A foil tray or doubled sheet of foil to sit under the food on the cool side and catch drips.
- Optional but useful: heatproof gloves, a probe thermometer, and a hinged grill grate so you can add coals without lifting everything off.
Building the two zones, step by step
- Clear the base. Empty old ash and check the bottom vents move freely and aren't clogged. Air is your thermostat; blocked vents make the rest of this pointless.
- Light a full chimney. A standard chimney holds roughly a kilogram of briquettes, about right for a 57cm kettle. On a 47cm grill, two-thirds to three-quarters of a chimney is plenty.
- Wait for grey. Briquettes take 15 to 20 minutes to turn ashen with a dull orange glow inside; lumpwood gets there in 10 to 15. Tip them out too early and you cook over flames, which means soot rather than smoke.
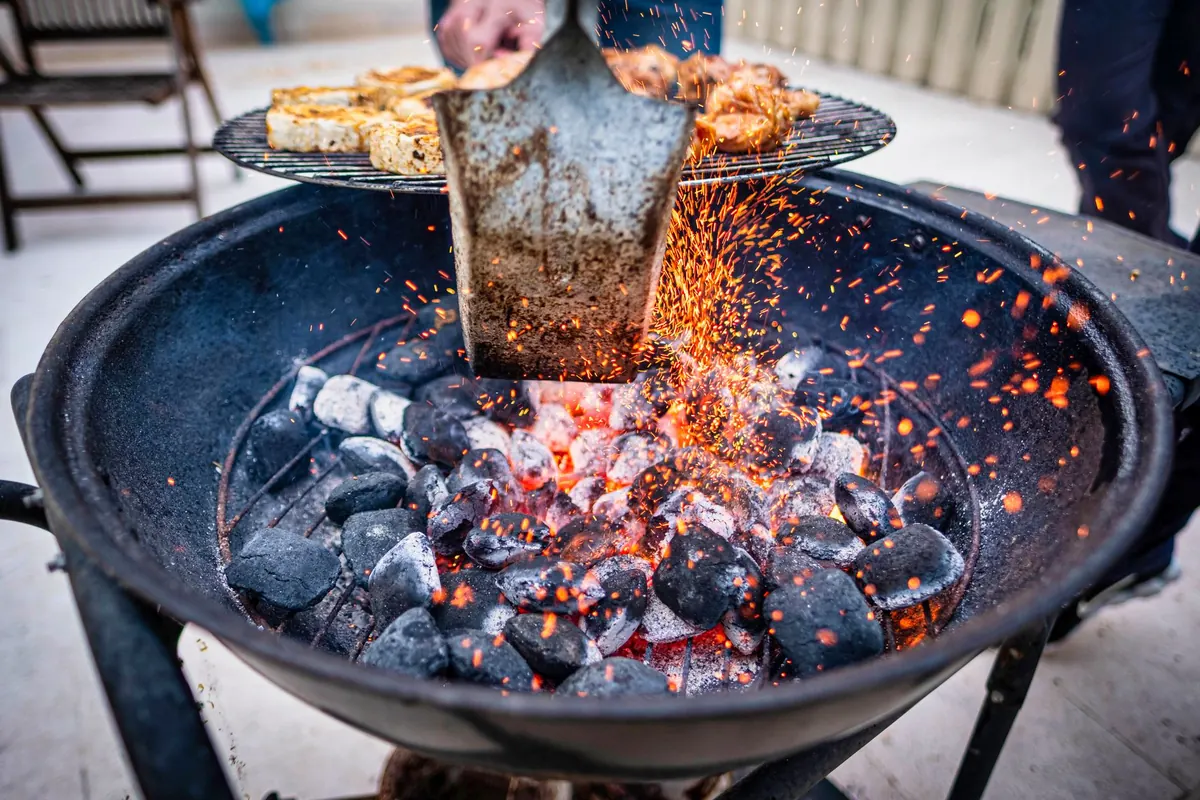
- Bank them on one side. Tip the lit coals onto one half of the coal grate and gather them with tongs into an even layer, about two coals deep. Keep the pile tight rather than scattered so the heat stays predictable.
- Give the empty side a tray. Put a foil tray on the cool side, directly under where the food will sit. It catches fat and juices, which stops flare-ups and makes cleaning up far less grim. A shallow water pan does the same job and adds a little moisture on long cooks.
- Replace the grate and heat it. Lid on, vents open, five minutes. Then brush the bars clean.
- Check the zones. Hold a hand at grate height over the coals: you should pull away within a second or two. Over the empty side you should manage four to five seconds before the heat becomes uncomfortable. That difference is your two zones in action.
Setting the vents for indirect cooking
Once the coals are banked, the vents are your only real control. For indirect cooking you want a gentle, steady flow of air across the food. The rule is simple: open the top vent on the opposite side from the coals, and keep the bottom vent partially open.
That way, air is drawn in through the bottom, travels up through the coals, crosses the cooking chamber under the lid, and exits above the cool side. The heat and smoke wash over the food before leaving — exactly what you want for even cooking and good flavour.
- For low and slow (around 110–130°C): bottom vent barely open (a fingernail's width), top vent half open. Watch the lid thermometer and adjust in tiny increments.
- For medium indirect (160–180°C): bottom vent a quarter open, top vent fully open.
- For hot indirect (200°C+): bottom vent half open, top vent fully open. Use this for roasting chicken or finishing a reverse-seared steak.
If the temperature climbs, close the bottom vent a little first. It takes a few minutes to respond, so wait before making another change. Chasing the dial with big adjustments is how you end up with a seesawing grill.
How to use the two zones in practice
The real beauty of two-zone cooking is that it lets you combine methods in one cook. Here are a few everyday examples.
Sausages that snap
Start the sausages over the direct zone for two or three minutes per side, until the skins are browned and starting to blister. Then slide them to the indirect side, close the lid, and cook for another 10–15 minutes until they're cooked through. No burnt casings, no raw middles.
Roast chicken
Set the bird on the indirect side, legs pointing towards the coals. Lid on, vents set for medium indirect. A 1.5kg chicken takes about 1 hour 15 minutes to 1 hour 30 minutes. If the skin needs more colour, move it over the direct zone for the last five minutes, turning once.
Steaks with a reverse sear
Cook thick steaks on the indirect side with the lid on until they reach about 48°C for medium-rare. Then move them directly over the coals for 60–90 seconds per side to build a dark crust. Rest in the indirect zone with the lid off for five minutes.
Low-and-slow ribs
Keep the coals banked, add a few unlit briquettes every hour, and maintain a temperature around 110°C. Ribs sit on the indirect side for four to six hours, mopped occasionally. The two-zone setup makes this almost hands-off.
Adding coals mid-cook
Long cooks will eventually run out of fuel. If you have a hinged grill grate, you can lift one section and add a handful of lit coals from a chimney without disturbing the food. Otherwise, slide the food to one side, lift the grate carefully with gloves, and add coals to the existing pile.
Always add lit coals, not unlit ones. Unlit briquettes give off a harsh, acrid smoke while they catch, which can taint the food. Keep a second chimney ready if you're cooking for more than two hours.
Tip: For very long cooks, try the snake or minion method: arrange unlit briquettes in a ring around the coal grate, then pour a chimney of lit coals on one end. The fire travels slowly around the ring, giving you hours of steady indirect heat.
Common mistakes to avoid
- Cooking before the coals are grey. Flames mean soot. Wait for the ash.
- Scattering the coals. A tight pile gives you a clear, predictable direct zone and a genuinely cool indirect zone. A scattered layer blurs the boundary.
- Forgetting the drip tray. Fat dripping onto hot coals creates flare-ups and greasy smoke. The tray keeps things civilised.
- Opening the lid too often. Every peek lets heat out and lengthens the cook. Trust your vents and your thermometer.
- Using the wrong charcoal. Instant-light bags are convenient but leave a chemical taste. Stick to plain briquettes or lumpwood.
Final thoughts
Two-zone cooking is not a fussy technique. It's just a sensible way to organise your coals so you have options. Once you've set it up a few times, you'll stop thinking about it and start using it instinctively — a quick sear here, a gentle finish there. And your grill will suddenly feel twice as useful, without spending a penny on new kit.
Photo: Andrej Zeman / Pexels